I've been home for about a week now since my trip to Asia. After doing some necessary cleaning, organizing, laundry (mountains of laundry), and spending some much needed fun time with my hubby, I think I am finally ready to get back into some DIY-ing! Before I left, we were mid-way through our Master Bedroom Redo Project and I am eager to get moving again on that again. Also, I realized I never wrapped up our Guest Room Redo (post tornado repair) so I hope to get some pictures taken and write up a quick post for that too!
For now though, it is time to wrap up the wainscoting tutorial and show you some more 'before' and 'afters'! The whole idea of adding wainscoting to our Dining Room came after Alex read an "All About Wainscoting" article in This Old House magazine. It gave us a lot of ideas and information for the project and it inspired the crap out of Alex so much so that he put it as his #1 project during the time I was away.
 Now before I begin I thought I would include this image below from This Old House to help with the terminology for this project, however, their construction is a bit more complex than ours. Alex did a few things differently since we wanted a more simplified look that would fit nicely in our home. Two examples: he used our existing baseboards and individual plywood panels between each stile instead of one on each wall.
Let's get started!
First, Alex removed the base cap from our existing baseboards. Then he measured and cut the chair-rail pieces for each wall (we used 1 piece of wood instead of the chair-rail cap and apron pieces in the image). After each piece was cut, he installed them with nails and nail glue. We chose the height for our wainscoting according to the height of the breakfast bar that separates our kitchen and dining room.
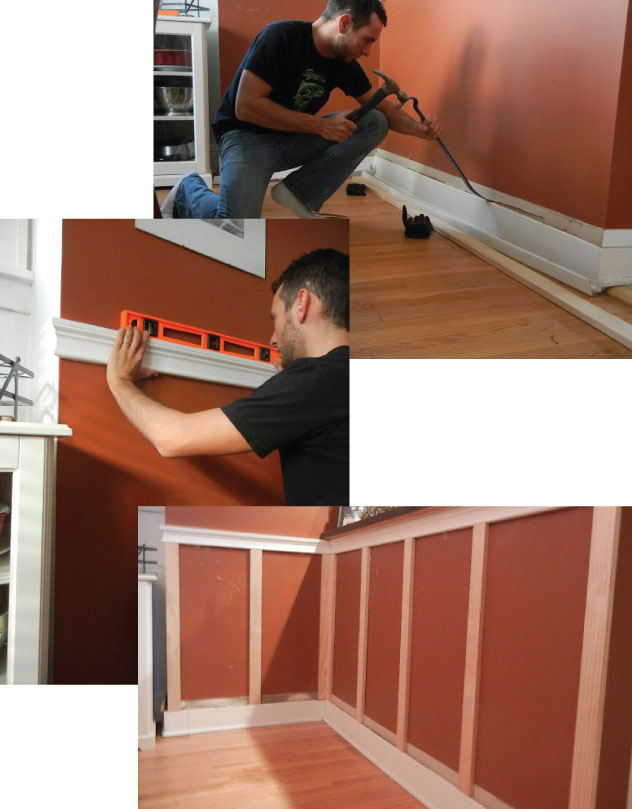
After the chair rail was in place, Alex installed the stiles evenly spaced along each wall.
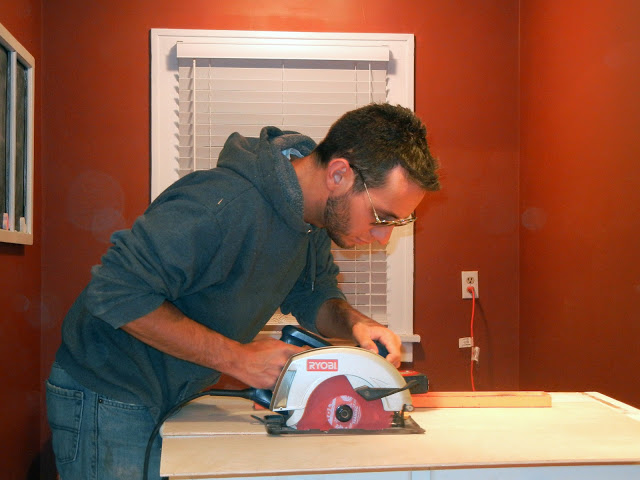
Next, Alex cut the 1/4" sanded plywood panels. Notice Alex opted for "Diddy" glasses again instead of taking the time to grab real safety goggles?
These are the panel sections that are installed between the stiles.

Alex installed them using nails and nail glue.

After they were all in place, Alex smoothed out the finish and saw lines using wood filler, caulk, and sand paper. Then it was time for the last step... paint!

Love that 'Before' and 'After' action!

It really helped to brighten up the space and make it feel a bit larger.
Now, I know a few of you are wondering why we aren't using my DIY Numbered Chair Covers (if you want to make your own view the sewing tutorial here and the painting tutorial here). We take them off from time to time, but Alex removed them from the chairs when he began working in the room. Maybe I will put them back on soon... or make something new and exciting, hmmm?!?!

One last look, ahhhh I am in love with this change!
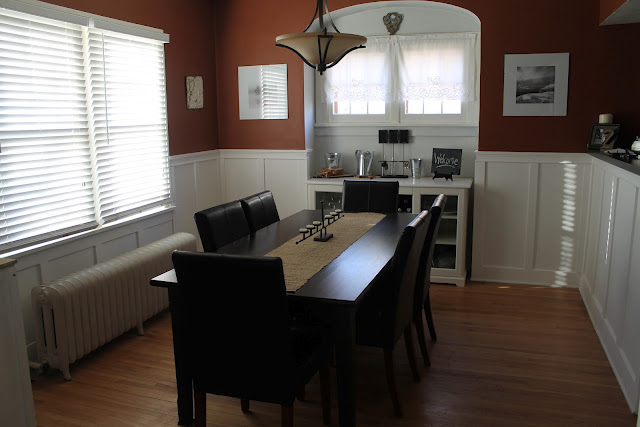
Alex estimates the project cost ended up just under $200 for the wood and small supplies. That's it for the wainscoting! Now I need to get our Dining Room decorated for Easter!
See you soon with an updated look at our Guest Room and progress in the Master Bedroom!